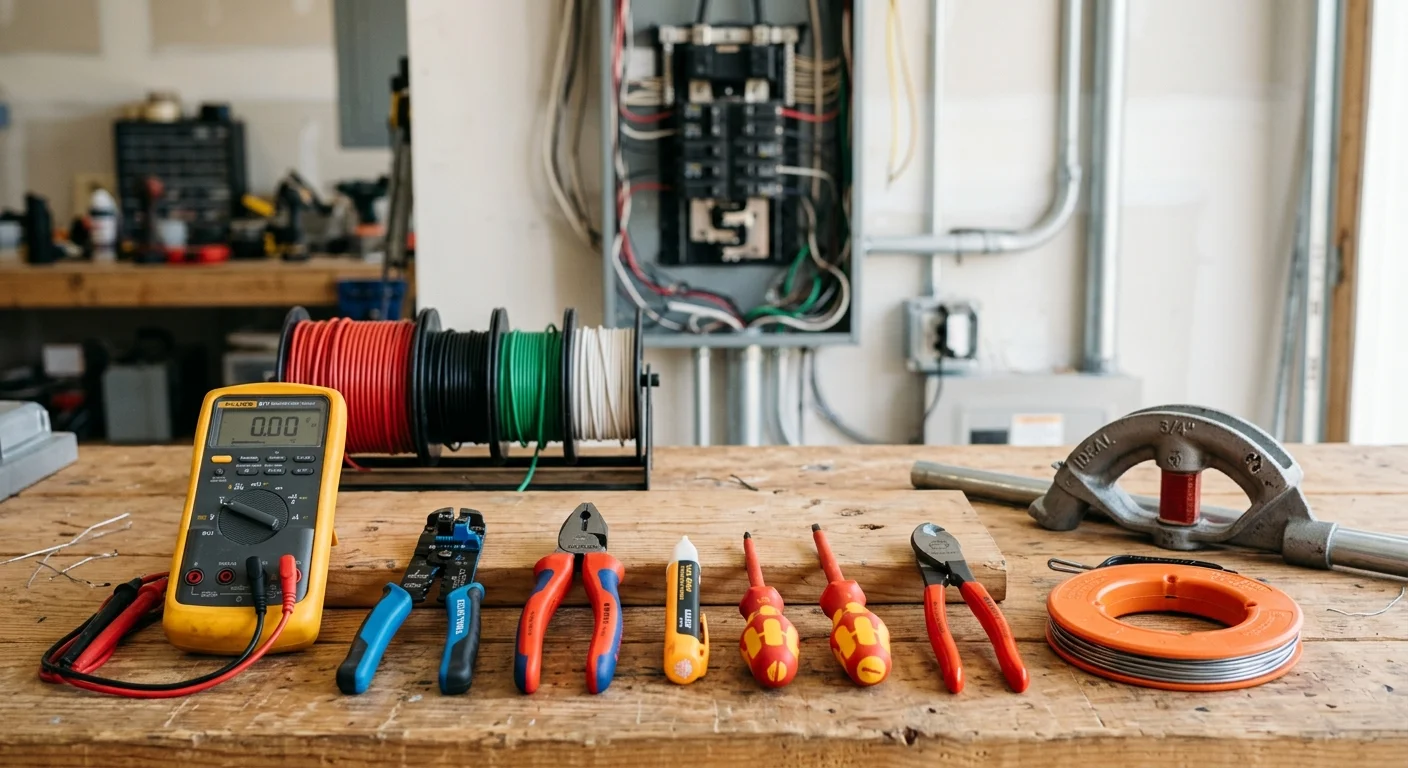

Every electrician accumulates hand tools quickly — strippers, pliers, drivers, a headlamp. But the instruments you use to test your work are in a different category entirely. They sit between you and lethal energy. A loose wire nut might trip a breaker. A faulty meter — or one rated for the wrong environment — can send you to the hospital, or worse.
This guide covers the testing and diagnostic equipment that electricians rely on from their first day on the job through decades of service. We will walk through the safety standards that govern these tools, break down each instrument category, and offer practical budget tiers so you know what to buy at each stage of your career. If you have already read our essential tools guide for electricians, consider this the next chapter — the one where precision and safety take center stage.
The Live-Dead-Live Protocol
Before we discuss any specific instrument, you need to understand the single most important testing procedure in the trade: the live-dead-live protocol.
NFPA 70E (2024) Article 110.4(E) requires the following sequence every time you perform an absence-of-voltage test:
- Live — Verify your test instrument on a known energized source. This confirms your meter is functioning correctly, the batteries are good, and the leads are intact.
- Dead — Use the verified instrument to test the circuit you intend to work on. Confirm no voltage is present on all phase conductors and the neutral, phase-to-phase and phase-to-ground.
- Live — Return to the known energized source and verify your instrument still works. This eliminates the possibility that your meter failed between the first and second steps — giving you a false “dead” reading on an energized circuit.
Skip any one of those three steps, and you have introduced the possibility that you are about to put your hands on an energized conductor while believing it is de-energized. NFPA 70E is explicit: all circuits are treated as energized until verified otherwise through this procedure.
This protocol is not optional, and it is not just for high-voltage work — NFPA 70E applies to all voltage levels. Build the habit now, even on 120V residential circuits, and it will be automatic when you are standing in front of a 480V distribution panel.
Understanding CAT Ratings
The measurement category (CAT) rating on your test instrument is not a marketing label — it is an engineering specification that determines whether the tool can survive a transient overvoltage event (a spike or fault) without exploding in your hands.
There are four categories, each tied to a location in the electrical distribution system. The closer you are to the utility service entrance, the higher the available fault current and the more dangerous a transient event becomes:
- CAT II — Receptacle-level loads: appliances, portable tools, outlets. Transient energy below 10kA. This is where most consumer-grade meters live.
- CAT III — Distribution-level: branch circuit panels, bus bars, permanent equipment connections. Transient energy below 50kA.
- CAT IV — Utility connection: the service entrance, meter base, overhead or underground lines from the utility. Transient energy up to 50kA or more.
The critical detail is that a meter’s CAT rating must match or exceed the highest category you could potentially encounter. A $15 hardware-store meter rated CAT II-300V might read voltage just fine in normal conditions. But if a transient event occurs while you are measuring inside a 480V panel, a CAT II meter lacks the internal protection (fuse ratings, arc suppression, input impedance) to contain the energy. The result can be an arc flash from the meter itself.
The practical rule: if you work on panels, switchgear, or anything upstream of a receptacle, your primary meter should be rated CAT III-600V minimum. If you ever work near the service entrance or utility metering, you need CAT IV-600V. This is one area where buying cheap is genuinely dangerous.
NFPA 70E Article 110.4(A) reinforces this: test instruments must be rated for the circuits and voltages where they will be used.
Digital Multimeters
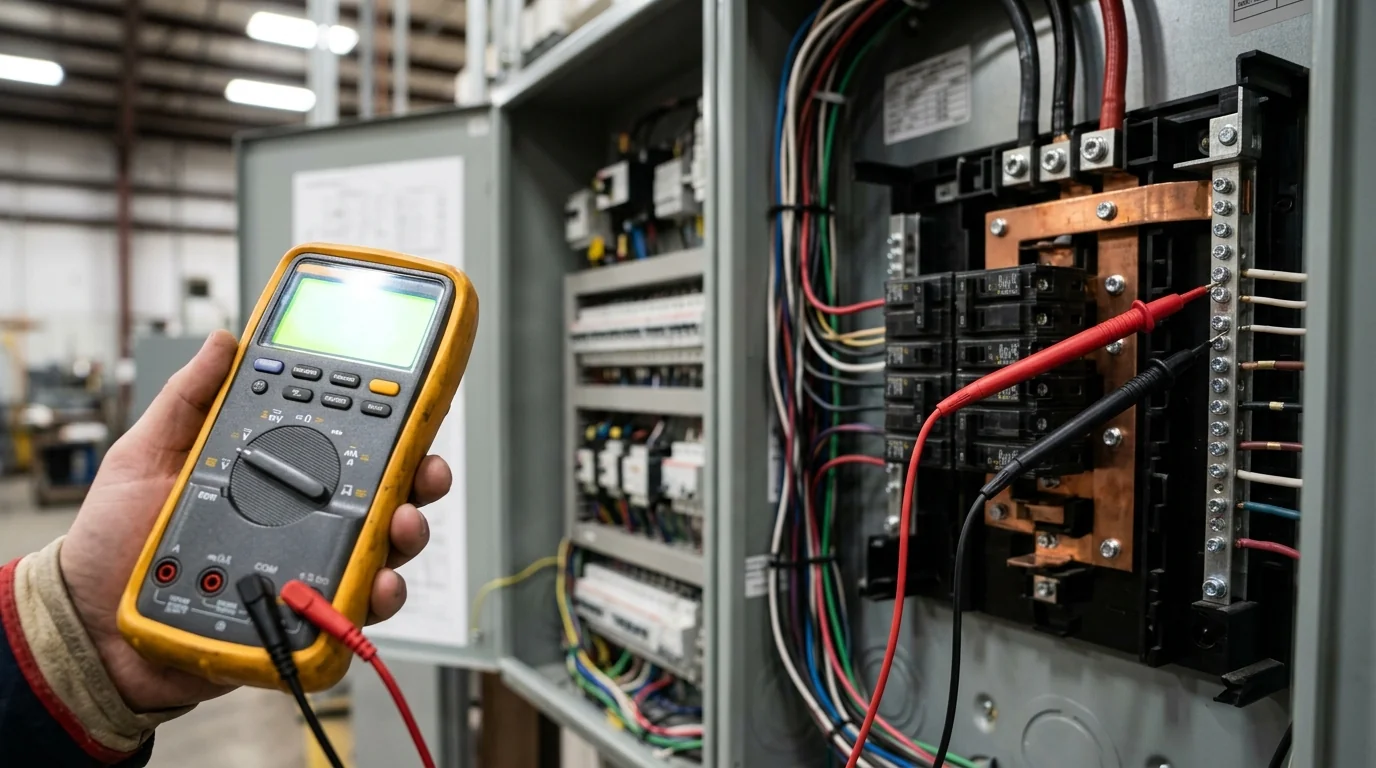
The digital multimeter (DMM) is the electrician’s most-used diagnostic instrument. It measures voltage (AC and DC), current, resistance, and continuity at a minimum — and most professional models add capacitance, frequency, diode testing, and temperature.
True RMS vs. Average-Sensing
This distinction matters more than most apprentices realize. Average-sensing meters assume a clean sine wave and calculate the RMS value mathematically. On a pure 60Hz sine wave, they are accurate. But modern electrical loads — VFDs, LED drivers, switching power supplies, computers — introduce harmonics that distort the waveform. An average-sensing meter will give you incorrect readings on distorted waveforms, sometimes by 20% or more.
True RMS meters sample the actual waveform and calculate the real root-mean-square value regardless of distortion. For any commercial or industrial work, true RMS is not optional — it is a requirement for accurate readings.
Features to Look For
- True RMS on both AC voltage and AC current
- CAT III-600V or CAT IV-600V rating
- Auto-ranging (saves time; manual ranging is fine but slower)
- Min/Max/Hold capture for intermittent readings
- Low-impedance (LoZ) mode to eliminate ghost voltages
- Backlit display (you will be in dark panels constantly)
- Durable leads with shrouded connectors rated to the meter’s CAT category
Budget Ranges
Entry-level professional true RMS meters (Fluke 115, Klein CL800) run $150-250. Mid-tier models with logging, advanced functions, and wireless connectivity (Fluke 117, 179, 87V) range from $250-450. For most journeymen, a solid meter in the $200-350 range will serve for years.
Clamp Meters
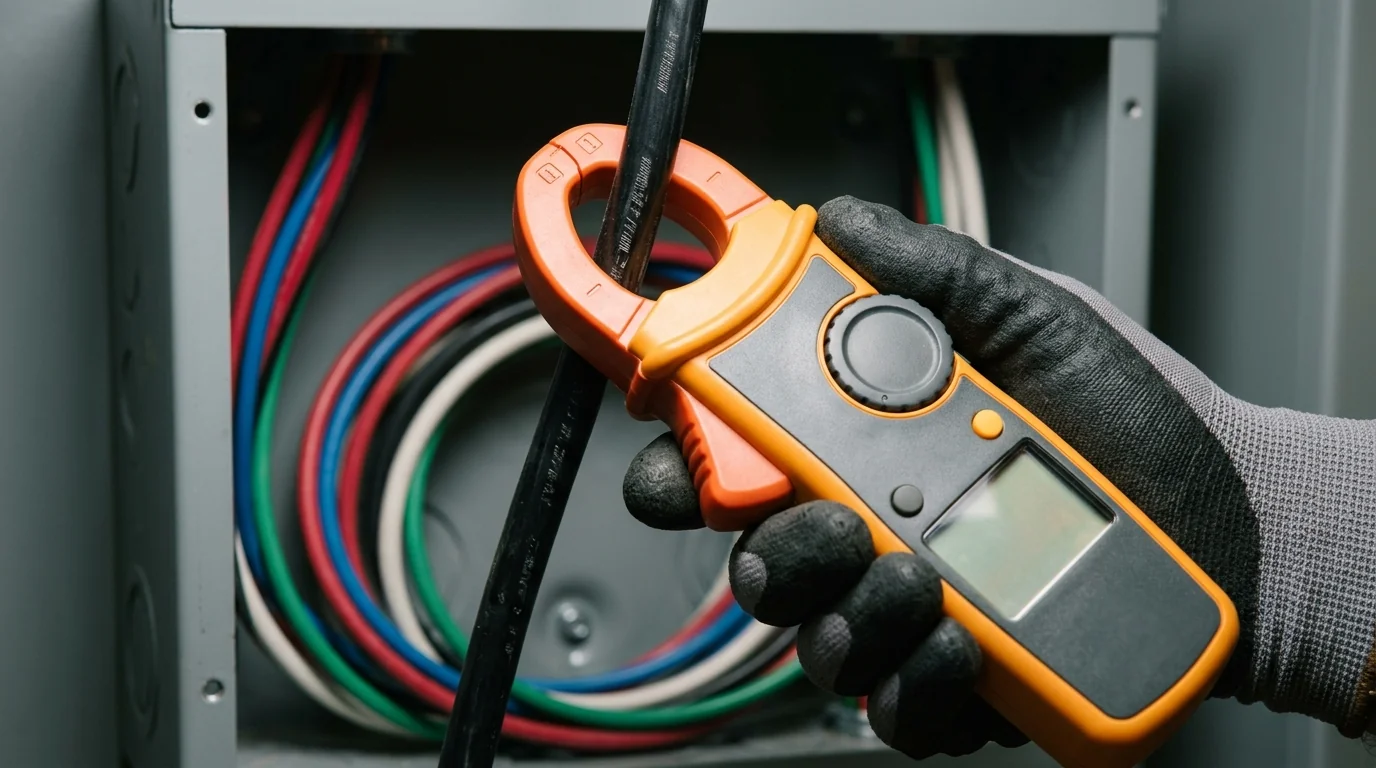
A clamp meter measures current by clamping around a conductor — no need to break the circuit. This is essential for troubleshooting live circuits and measuring load on individual conductors.
When to Use a Clamp Meter vs. a Multimeter
Use a clamp meter when you need to measure current without interrupting the circuit (which is most of the time in diagnostic work). Use a standard DMM when you need higher precision on low-current circuits, or when you are measuring voltage, resistance, or continuity — though many clamp meters now include these functions as well.
AC vs. AC/DC Clamp Meters
Standard clamp meters use a current transformer (CT) that only works on AC. For DC current measurement — solar systems, battery banks, automotive, some industrial controls — you need a Hall-effect clamp meter rated for AC/DC. These cost more but are increasingly necessary as DC systems become more common.
Inrush Current
Motor startup draws several times the running current for a brief moment. A clamp meter with an inrush function (sometimes labeled “in-rush” or “starting current”) captures this peak using a fast-sampling mode. Without it, you may miss the startup spike entirely or get a misleading average reading. This is particularly useful for troubleshooting motor starters, HVAC compressors, and pump circuits.
Look for a clamp meter rated at minimum CAT III-600V, with true RMS, and a jaw size large enough for the conductors you typically encounter. Budget $100-300 for a reliable professional model.
Voltage Testers and Detectors
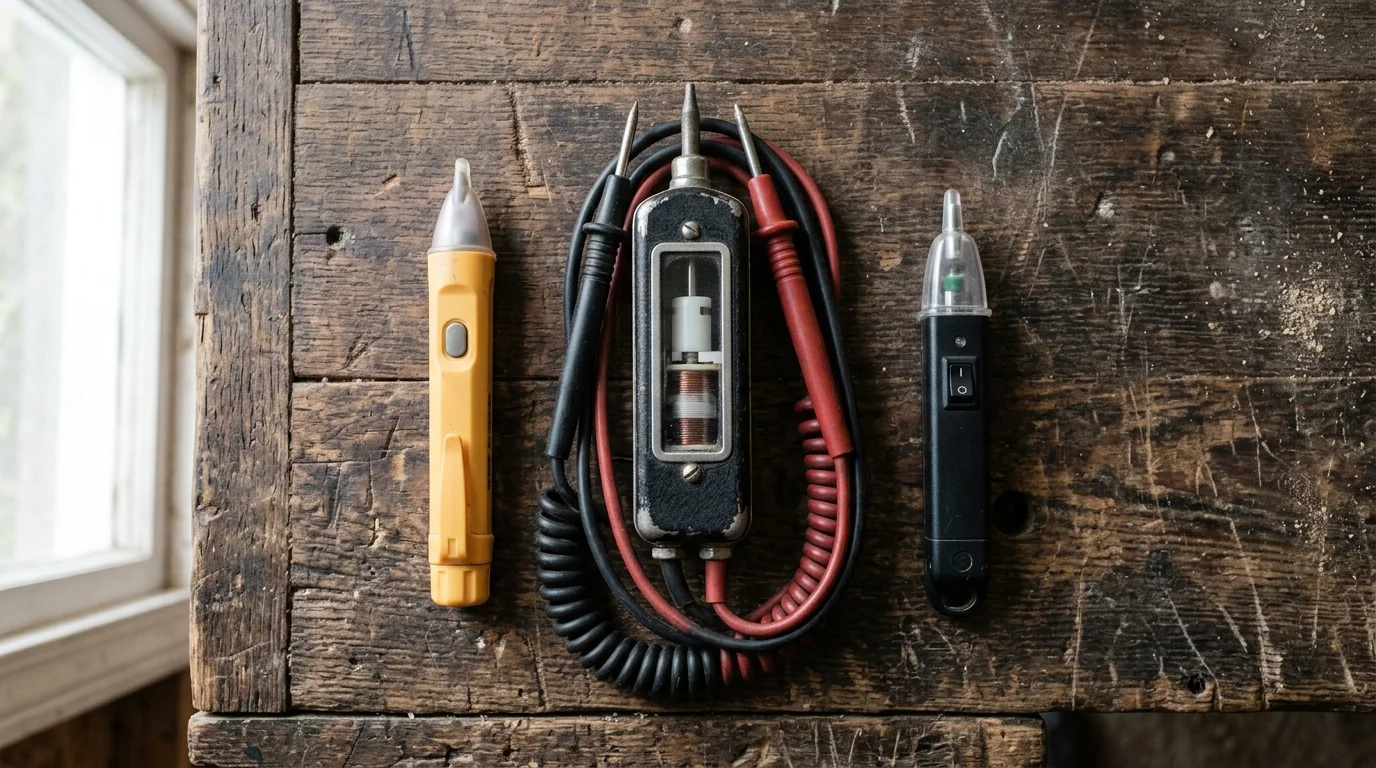
Not every voltage check requires a full multimeter. Several simpler instruments fill specific roles — but each has limitations you need to understand.
Non-Contact Voltage Testers (NCVTs)
These pen-shaped devices detect the electric field around an energized conductor without touching it. They are fast, convenient, and useful as a first-pass screening tool. However, NCVTs can give both false positives (detecting voltage from adjacent conductors, static, or fluorescent lighting) and false negatives (shielded cables, low voltage, deeply recessed conductors). An NCVT is never a substitute for a contact measurement with a rated meter. Use it to get a quick indication, then confirm with your DMM using the live-dead-live protocol.
Solenoid Testers (Wiggy)
The solenoid tester — often called a “wiggy” after the original brand name — uses a solenoid and a moving plunger to indicate voltage. Its key advantage is low input impedance, which means it loads the circuit and eliminates ghost or phantom voltages that can fool high-impedance digital meters. Many experienced electricians carry one specifically for this reason. The downside: they provide less precision (usually just a rough voltage indication) and draw enough current to trip sensitive GFCI circuits.
Proximity Detectors
These are non-contact devices designed for overhead lines or concealed wiring in walls and ceilings. They are useful for tracing and identifying energized conductors behind surfaces but share the same false-positive/false-negative limitations as NCVTs. They are a detection aid, not a verification tool.
The rule of thumb: non-contact and proximity tools tell you “there might be voltage here.” Only a rated contact instrument with the live-dead-live protocol tells you “this circuit is verified de-energized.”
Circuit Analyzers and Tracers
These tools help you understand how circuits are wired, identify problems in existing installations, and navigate panels efficiently.
Receptacle Testers
A three-light receptacle tester plugs into a standard outlet and indicates correct wiring, open ground, open neutral, reversed polarity, and similar faults. They cost $10-30 and every electrician should carry one. Limitation: they cannot detect a bootleg ground (a jumper from neutral to ground) — some advanced models with a GFCI test button can help identify this, but not all.
Circuit Tracers / Finders
A circuit tracer consists of a transmitter that injects a signal onto a circuit and a receiver that detects it at the panel. This lets you identify which breaker controls a given outlet, light, or junction box without flipping every breaker in the panel. Quality matters here — cheap tracers produce weak signals that bleed across adjacent conductors, giving you false identifications. Expect to spend $100-250 for a reliable set.
Phase Rotation Meters
On three-phase systems, correct phase rotation is critical — a motor connected with reversed rotation will spin backward, potentially damaging equipment or creating a safety hazard. A phase rotation meter confirms the phase sequence (ABC vs. ACB) in seconds. You will not need one for residential work, but it becomes essential in commercial and industrial settings. Budget $50-150.
Insulation Resistance Testers (Megohmmeters)
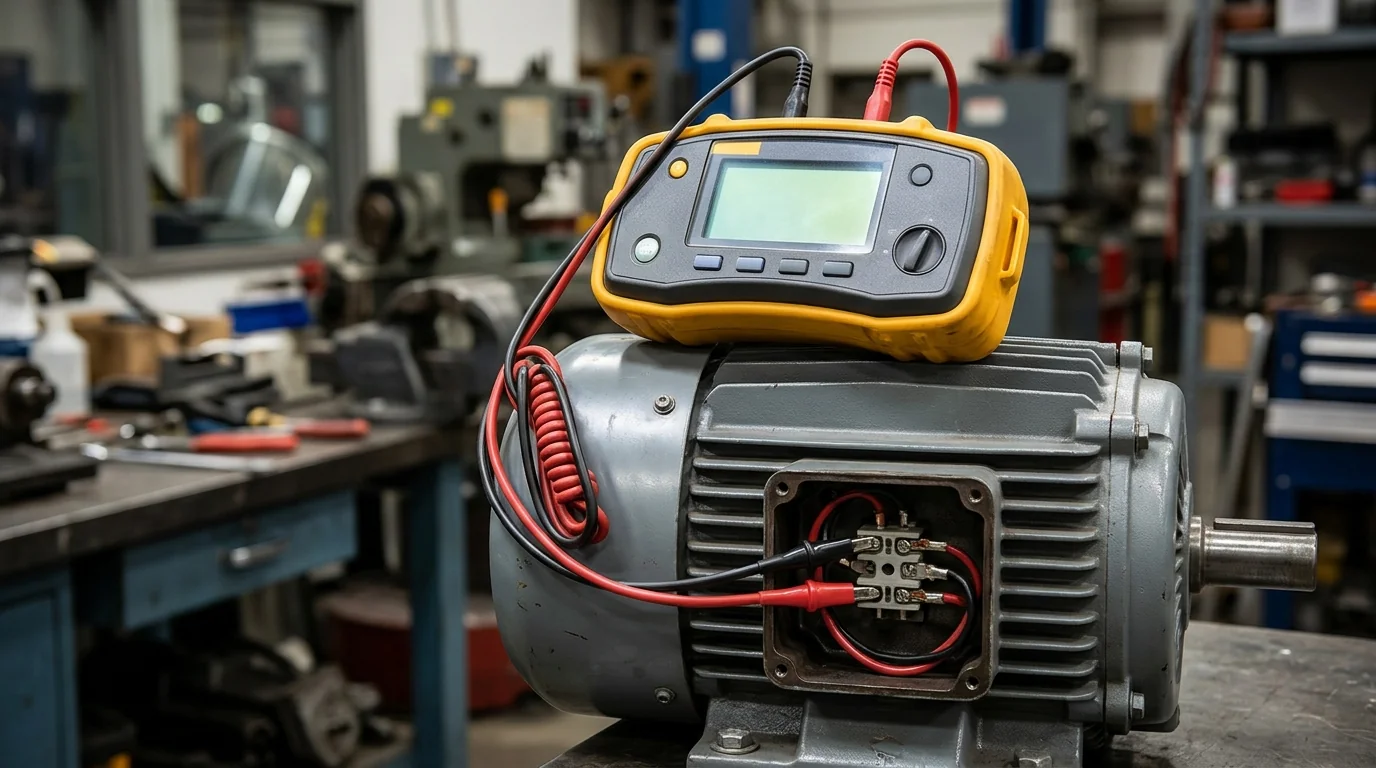
A megohmmeter — commonly called a “megger” — applies a high DC voltage (typically 250V, 500V, or 1000V) to a conductor and measures the insulation resistance in megohms. This test reveals deteriorating insulation before it fails in service, causing ground faults, shorts, or fires.
When You Need One
- Commissioning new installations before energizing
- Troubleshooting insulation breakdown in motors, transformers, or long cable runs
- Periodic maintenance testing per NFPA 70B recommendations
- After flooding, fire exposure, or any event that may have damaged insulation
Interpreting Readings
As a general guideline, insulation resistance should be at least 1 megohm per 1,000 volts of operating voltage plus 1 megohm (so a 480V system should read at least 1.48 megohms minimum). However, acceptable values vary by equipment type — motor manufacturers typically specify minimum insulation resistance in their documentation. The trend over time matters more than any single reading: steadily declining values indicate deteriorating insulation even if absolute numbers are still above minimum.
Megohmmeters range from $200 for basic models to $1,500+ for units with PI (polarization index) and DAR (dielectric absorption ratio) testing, data logging, and multiple test voltages. Most journeymen will not own one personally — they are typically employer-provided for specific maintenance and commissioning work.
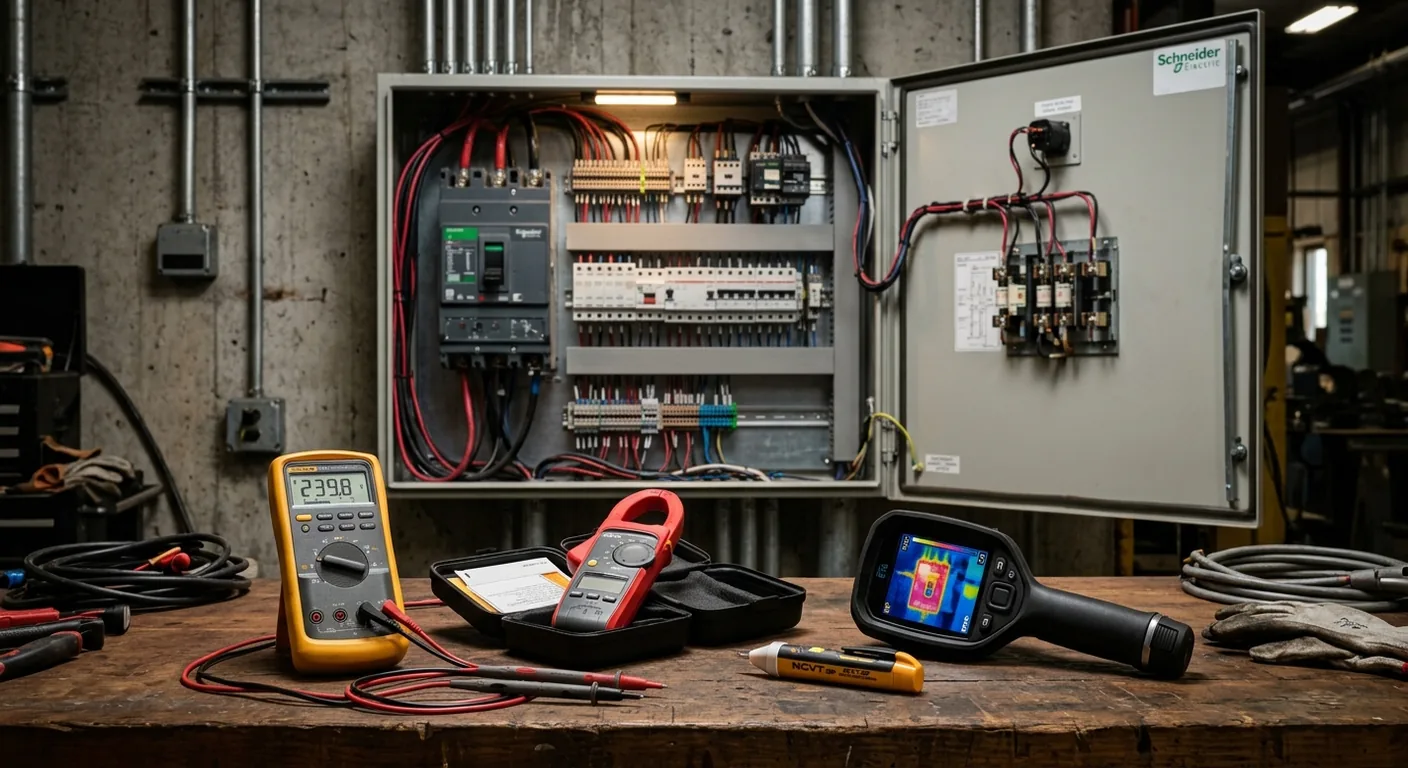
Thermal Imaging Cameras

Thermal imagers have moved from exotic luxury to practical field tool as prices have dropped. For electrical work, they detect heat generated by high-resistance connections, overloaded conductors, and failing components — often long before visible damage occurs.
How They Pay for Themselves
A loose lug, corroded connection, or overloaded breaker generates excess heat. Fluke’s thermal imaging data documents real-world examples of failing connections running 45 to 160 degrees Celsius above ambient temperature. Catching these before catastrophic failure prevents equipment damage, unplanned downtime, and potential fires.
NETA Temperature Thresholds
The International Electrical Testing Association (NETA) provides temperature difference thresholds that guide maintenance decisions:
- 1-15 degrees C above similar components — monitor and schedule maintenance
- 16-35 degrees C above similar components — repair at earliest convenience
- Over 15 degrees C above maximum rated temperature — immediate action required
- Over 40 degrees C above ambient — red alert, immediate action
Practical Considerations
For accurate readings, systems should be at a minimum of 40% load during the scan. A lightly loaded panel will not reveal the thermal signatures of failing connections. Schedule scans during peak operating periods for the most useful data.
Entry-level thermal cameras with sufficient resolution for electrical work (at least 160x120 pixels) start around $300-500. Professional-grade units with higher resolution, advanced analysis software, and radiometric capability run $1,500-5,000. Some DMMs and clamp meters now include a small integrated thermal sensor — useful for quick screening but not a replacement for a dedicated imager.
Power Quality Analyzers
When a standard multimeter shows normal voltage but equipment is still malfunctioning — drives faulting, lights flickering, capacitor banks failing prematurely — the problem is often power quality. Harmonics, voltage sags, swells, transients, and power factor issues are invisible to a basic meter.
A power quality analyzer captures these events over time, logging waveforms, harmonics (individual and total harmonic distortion), voltage events, and power factor. This data is essential for diagnosing problems caused by non-linear loads, utility events, or interactions between equipment.
When Basic Meters Are Not Enough
- Motors or drives tripping without clear overload
- Premature capacitor or transformer failure
- Flickering or dimming lights with no obvious wiring issue
- Customer complaints of equipment damage during storms or switching events
- Energy auditing and demand management
Power quality analyzers are specialized instruments, typically costing $2,000-10,000+ for three-phase capable units. Most electricians will not purchase one personally — these are employer or shop tools used for specific diagnostic and commissioning tasks. But understanding what they measure and when they are needed is valuable knowledge, especially as you advance into commercial and industrial work.
Maintaining and Testing Your Test Equipment
Your test instruments are only as reliable as their maintenance. A meter with dead batteries, damaged leads, or drifted calibration is worse than useless — it gives you false confidence.
Daily Inspection
Before each use, visually inspect your meter body for cracks or damage, check test leads for cuts, exposed wire, or damaged insulation, and verify probe tips are intact. Replace any component that shows wear. This is not paranoia — it is basic professional practice.
Calibration
Manufacturers specify calibration intervals, typically annually. A meter that has drifted out of calibration may read 118V on a 125V circuit — close enough to seem normal, far enough to mask a problem. Professional calibration from an accredited lab costs $50-150 per instrument and includes a certificate of traceability.
OSHA-Mandated Testing for Protective Equipment
Under OSHA 1910.137, rubber insulating equipment used for electrical protection has mandatory testing intervals:
- Rubber insulating gloves: Electrically tested every 6 months per ASTM D120-09
- Rubber insulating blankets and sleeves: Electrically tested every 12 months per ASTM D1048-12
- Visual inspection: Required before each day’s use
These are not suggestions — they are regulatory requirements. Using out-of-date protective equipment puts your life at risk and exposes your employer to citations. Keep a log of test dates and set calendar reminders.
Budget Guide: What to Buy and When
Building a professional testing toolkit is a progressive investment. Here is a practical approach at each career stage.
Apprentice Kit ($200-400)
You need reliable basics that meet safety standards:
- True RMS digital multimeter (CAT III-600V minimum) — $150-250
- Non-contact voltage tester — $20-30
- Receptacle tester — $10-20
- Quality test leads (rated to match your meter) — $30-50
This kit handles 90% of what you will encounter during training and early field work. Do not buy the cheapest meter available — invest in a reputable brand (Fluke, Klein, Ideal, Fieldpiece) with proper CAT ratings.
Journeyman Kit ($500-1,200)
Add capability as your responsibilities grow:
- Everything in the apprentice kit
- True RMS clamp meter (AC/DC, CAT III-600V) — $150-300
- Circuit tracer set — $100-200
- Solenoid tester — $50-80
- Phase rotation meter (if doing three-phase work) — $50-150
- Low-impedance voltage tester — $40-80
Diagnostic Specialist ($2,000+)
For electricians specializing in maintenance, commissioning, or troubleshooting:
- Everything in the journeyman kit
- Thermal imaging camera — $500-3,000
- Insulation resistance tester (megohmmeter) — $300-1,500
- Power quality analyzer — $2,000-5,000+ (often employer-provided)
- Advanced data-logging multimeter — $400-600
The key principle at every level: buy the best safety rating and build quality you can afford. A well-made meter lasts a decade or more. A cheap one may not last through a single fault event.
Start Your Electrical Career
The electrical trade offers strong career prospects. According to the Bureau of Labor Statistics, electricians earn a median annual wage of $62,350, with projected job growth of 9% from 2024 to 2034 — faster than average for all occupations. With approximately 81,000 job openings projected each year across a workforce of 818,700, demand for skilled electricians remains consistently strong.
Getting started means enrolling in an accredited program that combines classroom instruction with hands-on training — including proper use of the testing and diagnostic equipment covered in this guide. Browse electrical technology programs to find training near you, or explore electrical career opportunities for a broader look at where this path can lead. You can also compare programs at the best electrician schools to find the right fit for your goals.
The instruments in this guide are not just tools — they are the foundation of safe, professional electrical work. Learn them well, maintain them properly, and they will serve you through every stage of your career.
Sources
- Bureau of Labor Statistics — “Electricians: Occupational Outlook Handbook” — https://www.bls.gov/ooh/construction-and-extraction/electricians.htm
- OSHA — “1910.137 — Electrical Protective Equipment” — https://www.osha.gov/laws-regs/regulations/standardnumber/1910/1910.137
- NFPA — “NFPA 70E: Standard for Electrical Safety in the Workplace (2024)” — https://www.nfpa.org/codes-and-standards/nfpa-70e-standard-development/70e
- NFPA — “NFPA 70B: Recommended Practice for Electrical Equipment Maintenance” — https://www.nfpa.org/codes-and-standards/nfpa-70b-standard-development/70b
- Fluke — “Multimeter Safety” — https://www.fluke.com/en-us/learn/blog/safety/multimeter-guide
- Fluke — “Thermal Imaging for Electrical Systems” — https://www.fluke.com/en-us/learn/blog/thermal-imaging/electrical-systems
- Fluke — “Electrical Testing Safety: Preparing for Absence of Voltage Testing” — https://www.fluke.com/en-us/learn/blog/electrical/part-1-electrical-testing-safety-preparing-for-absence-of-voltage-testing