
A workshop is the one tool that holds all your other tools. Get it wrong — bad layout, inadequate power, no dust management — and every project you take on will fight you. Get it right, and the space pays for itself by letting you work faster, cleaner, and with less frustration.
The good news is that “right” doesn’t mean “expensive.” According to Fine Woodworking, a fully equipped workshop can come together for around $5,000 buying new, or roughly $2,500 buying used. Many working carpenters started with far less than that — a single-car garage, a few hundred dollars in tools, and a plan for what to add next.
This guide covers how to set up your first workshop from scratch: where to put it, how to wire it, what tools to prioritize, how to handle dust, and what each budget level actually gets you. Whether you’re an apprentice building skills on the side or a hobbyist getting serious about the trade, the approach is the same — plan first, buy smart, and build the shop incrementally as your work demands it.
Choosing Your Space
You need a dedicated space. Working off a folding table in a shared area means setting up and tearing down every session, which kills momentum and limits what you can take on. Even a modest permanent space beats a large temporary one.
Garage (single or double car)
The most common choice, and for good reason. Concrete floor, overhead door for moving materials and ventilation, usually some existing electrical service. A single-car garage gives you roughly 200 square feet, which is tight but workable if you plan your layout carefully and invest in mobile bases for larger tools. A two-car garage (roughly 400-500 square feet) is more comfortable and allows you to leave tools set up between sessions.
Downsides: temperature swings affect both your work and your materials. Wood expands and contracts with humidity, and glue-ups in freezing temperatures fail. If the garage is attached to the house, dust and noise travel inside — a concern you’ll need to address with sealing and dust collection.
Basement
Basements offer climate control and year-round usability. Humidity can be managed with a dehumidifier. The major limitations are getting materials in and out (stairway dimensions and ceiling height restrict what you can bring down), lower ceilings that limit the swing of some tools, and the fact that dust and fumes have no natural ventilation path.
If your ceiling height is under 8 feet, overhead work becomes cramped and routing dust collection ductwork gets complicated. Basements work best for fine woodworking and smaller projects rather than framing or construction carpentry.
Shed or outbuilding
A detached structure isolates noise and dust from the house entirely, which is a real advantage. The tradeoff is that most sheds lack electrical service, insulation, and climate control. You’ll need to run power from the main panel (more on that below), and in cold climates you’ll need a heat source to work through winter months.
Minimum useful size
You can make 150 square feet work if you’re disciplined about layout and use mobile tool bases, but 200-300 square feet is where a shop starts to feel functional. Below 150 square feet, you’ll spend more time rearranging than working.
Whichever space you choose, prioritize these qualities: adequate ceiling height (8 feet minimum), a flat and level floor, at least one entry point wide enough for sheet goods (a standard 4x8 plywood sheet needs a 4-foot-wide opening), and proximity to electrical service.
Electrical Requirements
Electrical is the infrastructure that separates a workspace from a workshop. Undersize it and you’ll be tripping breakers, running extension cords across the floor, and limiting what tools you can run.
Dedicated circuits
Per NEC 210.11(C)(4), a garage requires at least one 120V, 20-amp branch circuit dedicated to garage receptacles. That’s a minimum — for a working shop, you’ll want more. Plan for at least two 20-amp 120V circuits for general outlets, positioned so you can run a tool on one side of the shop while having a shop vac or dust collector on the other circuit.
240V service
Larger tools — table saws, planers, jointers, and some dust collectors — either require or perform significantly better on 240V power. If your space doesn’t have 240V service, budget for an electrician to run a dedicated 240V circuit. This is not a DIY-and-hope-for-the-best situation: improper wiring is a fire hazard. A licensed electrician will typically charge $300-800 to run a new 240V circuit from your panel to your shop, depending on distance and panel capacity.
GFCI protection
All 125V receptacles in a garage require GFCI (ground-fault circuit interrupter) protection per current NEC requirements. This is a safety essential in a shop environment where you’re working around conductive dust and potentially damp conditions.
Lighting
Poor lighting leads to inaccurate cuts and unsafe working conditions. LED shop lights are inexpensive and draw minimal power. Aim for at least 50 lumens per square foot — that’s around 10,000 lumens for a 200-square-foot shop. Position overhead fixtures to minimize shadows at your primary work stations, particularly the table saw and workbench.
Budget $200-800 for electrical improvements, depending on your starting point. If your space already has a sub-panel and 240V service, you may only need additional outlets and lighting. If you’re starting from a bare shed with no power, expect to spend toward the higher end.
The Workbench: Your Workshop’s Foundation
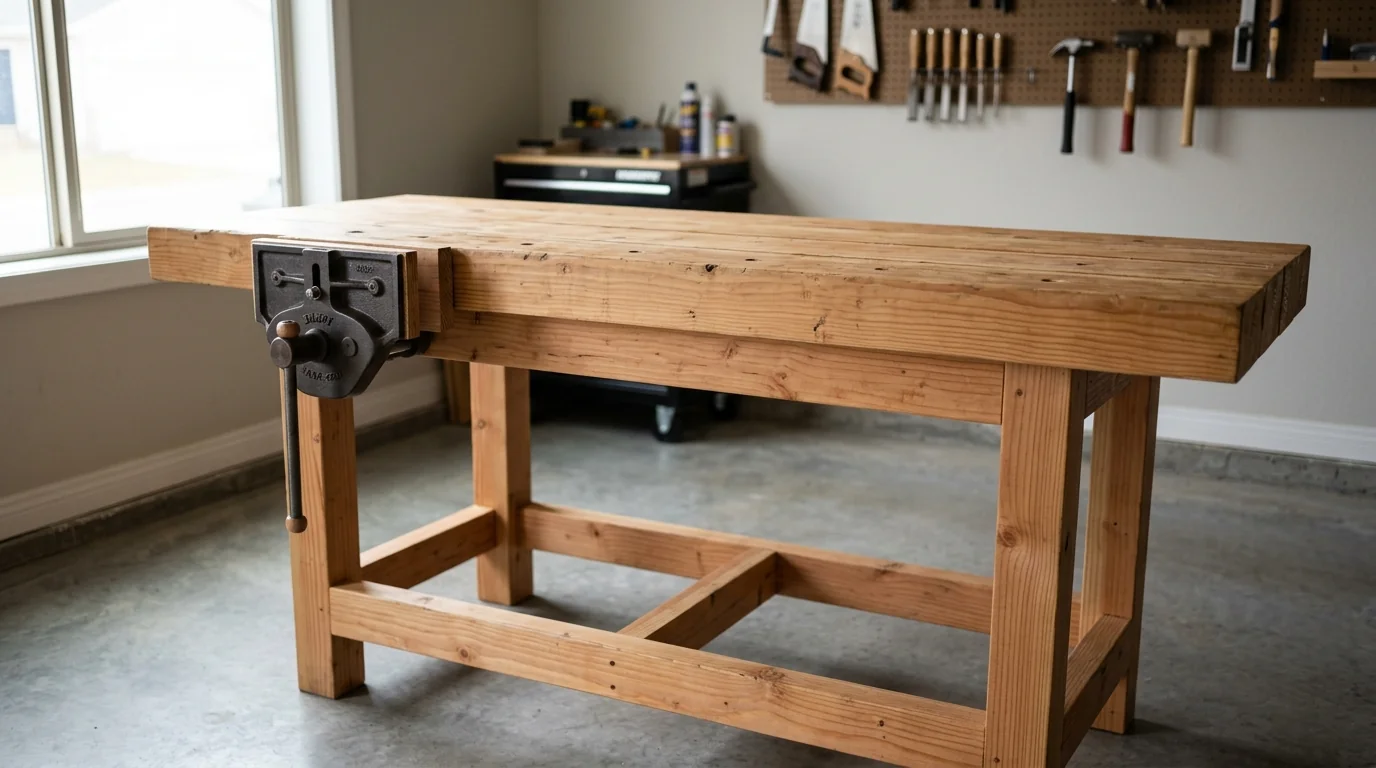
Before you buy a single power tool, you need a workbench. It’s the surface where you measure, mark, assemble, clamp, and do hand work. Every project passes through it.
Dimensions
A workbench should be roughly 24-30 inches deep, 60-84 inches long, and tall enough that you can stand with your palms flat on the surface without stooping. For most people, that’s 34-36 inches high. Too low and your back suffers; too high and you lose leverage for hand planing and chiseling.
DIY vs. purchased
A solid DIY workbench built from construction lumber (2x4s and a laminated top of 2x6s or 2x8s) runs $100-250 in materials and produces a bench that will outperform most factory-made options in the same price range. The build itself is a good first project: it teaches you about joinery, accurate measurement, and working to square — skills you’ll use on everything that follows.
Purchased benches range from $200 for basic utility models to $1,000+ for heavy hardwood benches with integrated clamping systems. For a first bench, the DIY route makes more practical and financial sense.
Vise
A front vise (mounted on the face of the bench) holds workpieces for planing, sawing, and chiseling. A good bench vise costs $50-150 and transforms what your bench can do. It’s one of the highest-value additions to any workshop.
Essential Power Tools (Priority Order)
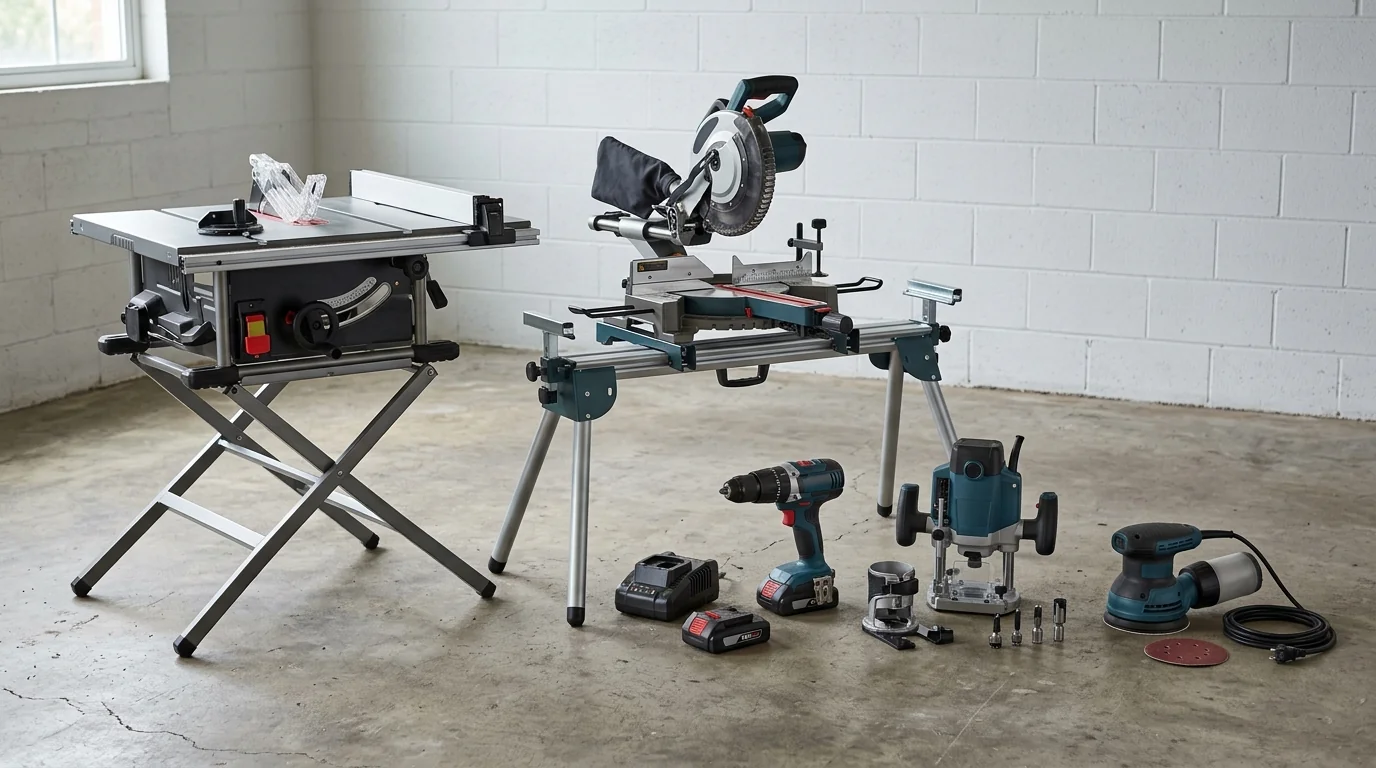
You don’t need every tool at once. Buy in this order, based on what unlocks the most capability at each step. As Popular Woodworking notes, the key is prioritizing the tools that handle the widest range of tasks first.
1. Drill/driver (cordless)
You’ll use this every single session — drilling, driving screws, boring holes for hardware. Get a kit with two batteries and a charger. Budget $80-200. This is the one tool where buying into a battery platform matters: whatever brand you choose, your future cordless tools (impact driver, circular saw, sander) should share the same batteries.
2. Table saw
The table saw is the centerpiece of a workshop. It rips lumber to width, crosscuts with a sled, cuts joints, and handles sheet goods. A contractor-style table saw (portable with folding stand) is the best starting point — capable enough for serious work, compact enough for a small shop, and priced between $300-600 new. A used contractor saw in good condition can be found for $150-300.
Check the fence: it should lock parallel to the blade without deflection. A bad fence makes every cut inaccurate, and upgrading an aftermarket fence often costs nearly as much as the saw.
3. Miter saw (10-inch compound)
Accurate crosscuts and angled cuts in trim, molding, and dimensional lumber. Finish carpentry in particular revolves around the miter saw. A sliding compound model handles wider boards and costs $250-500 new. Non-sliding models are $150-300 and adequate for most work under 6 inches wide.
4. Router
A plunge router with a fixed-base kit opens up edge profiling, dado cuts, template work, and joinery — tasks that are difficult or impossible with other tools. Budget $120-250 for a quality combo kit. You’ll collect router bits over time, starting with a straight bit, a roundover, and a flush-trim bit ($30-60 for a starter set).
5. Random-orbit sander
Sanding by hand is slow and inconsistent. A random-orbit sander produces a smooth, swirl-free surface in a fraction of the time. Budget $50-100. This is a tool where mid-range models perform nearly as well as premium ones — save your money here and spend it elsewhere.
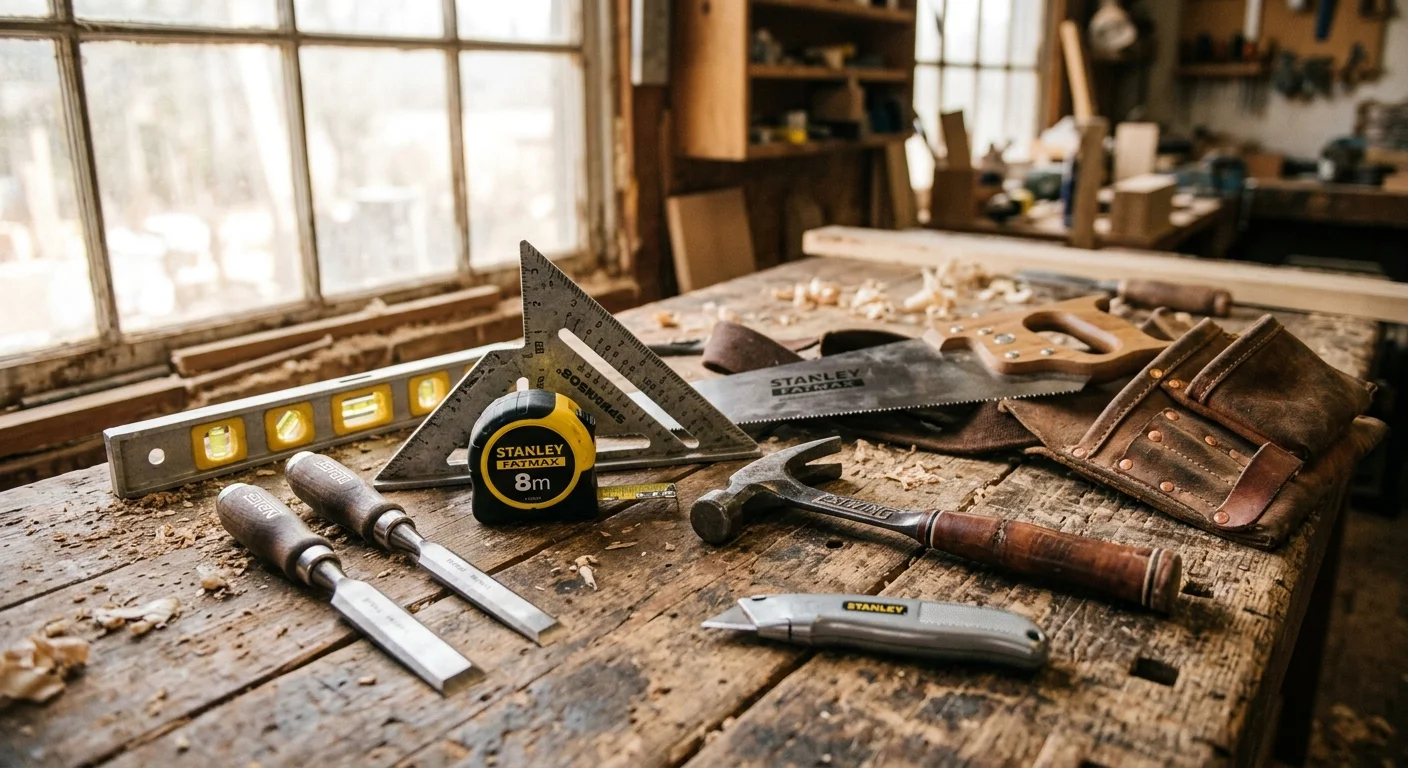
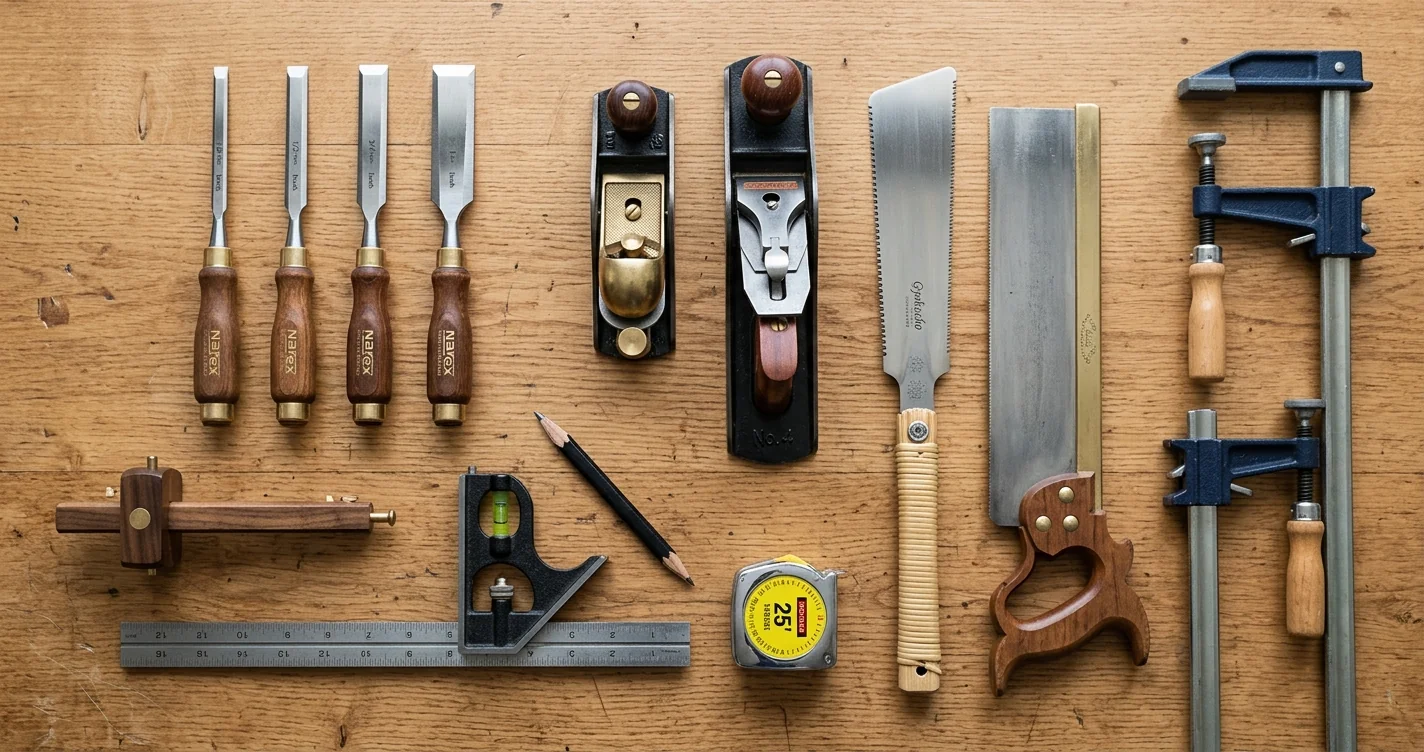
Hand Tools You’ll Use Every Day
Power tools get the attention, but hand tools do the precision work. For a detailed breakdown of the full range, see our essential tools guide for carpenters.
Chisels
A set of four bench chisels (1/4”, 1/2”, 3/4”, and 1”) handles most tasks: cleaning joints, fitting hardware, paring end grain, and trimming glue squeeze-out. High-carbon steel holds an edge better than cheaper alloys. Budget $30-80 for a quality starter set, and invest $20-40 in a sharpening system (diamond plates or waterstones) early on. A dull chisel is more dangerous than a sharp one because it demands excessive force.
Hand planes
A block plane and a No. 4 or No. 5 bench plane cover a surprising range of work: smoothing rough surfaces, trimming doors and drawers to fit, chamfering edges, and flattening panels. Used hand planes are one of the best values in woodworking — older models from estate sales are often higher quality than new budget options. Budget $40-120 for a usable pair.
Measuring and marking tools
Accuracy starts here. A 25-foot tape measure, a combination square (12-inch), a marking gauge, and a sharp pencil are the baseline. A combination square that’s actually square (check it against a known straight edge) matters more than the brand name on it. Budget $40-80 for the set.
Clamps
You never have enough clamps. Start with four 24-inch bar clamps, four 36-inch bar clamps, and a handful of spring clamps. Clamps hold glue-ups together, secure jigs to tables, and stabilize workpieces for routing and sanding. Budget $60-120 for a starter collection.
Hand saws
A Japanese-style pull saw and a dovetail saw handle fine joinery work that power saws can’t reach. For rough work, a crosscut hand saw remains useful when setting up a power saw would take longer than making the cut. Budget $30-60.
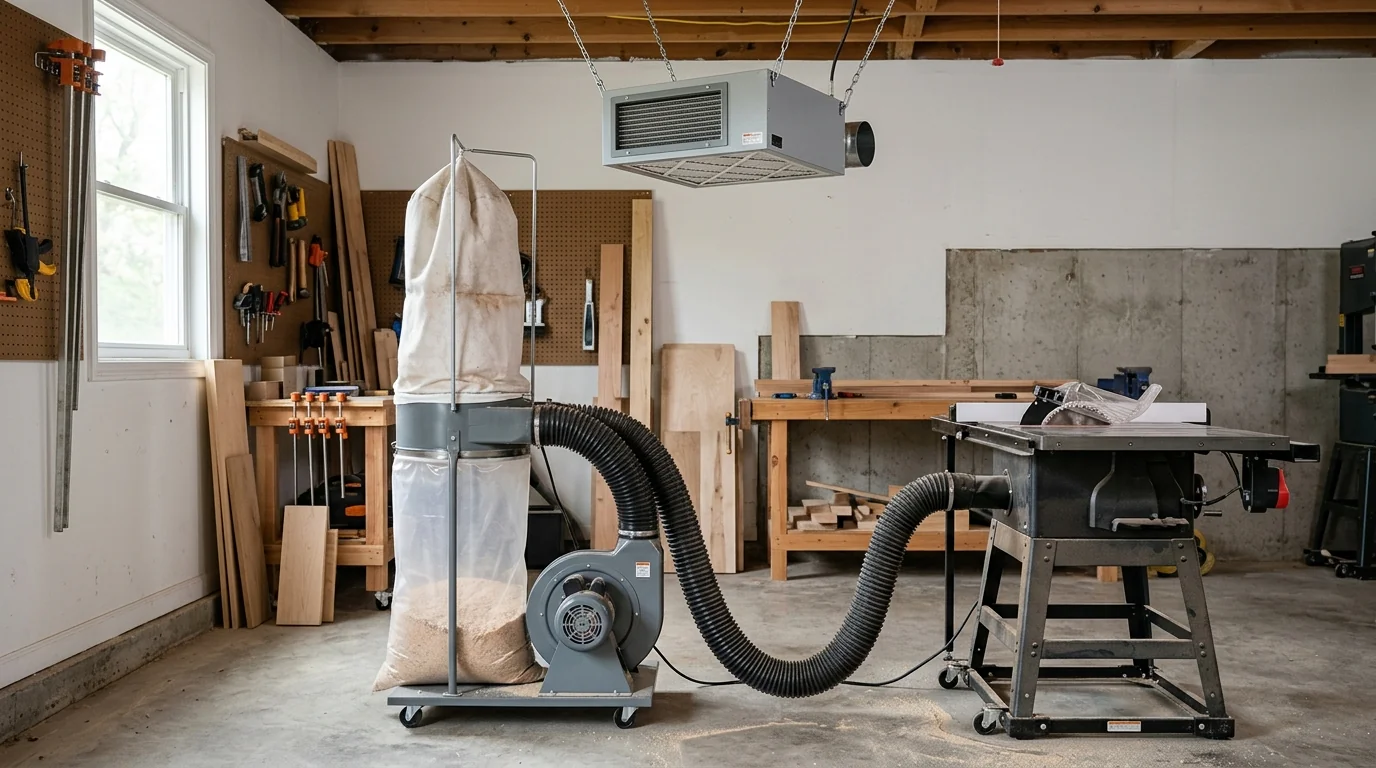
Dust Collection and Ventilation
This is not optional. It’s not something you add later when you “get more serious.” It belongs in your shop from day one.
OSHA classifies wood dust as a carcinogen. Hardwood dust in particular is associated with nasal cancer, and both hardwood and softwood dust cause allergic respiratory symptoms and dermatitis. The OSHA permissible exposure limit (PEL) is 15 mg/m3 total dust and 5 mg/m3 respirable dust. NIOSH recommends a far more protective limit of just 1 mg/m3. These are workplace standards — but your home shop generates the same dust, and you’re the one breathing it.
According to OSHA’s woodworking dust control guidelines, sanders, shapers, and routers are the worst offenders for fine dust production. Duct velocity for effective capture should be 2,500-4,000 feet per minute (FPM). And engineering controls — meaning dust collection at the source — are preferred over PPE like respirators.
Shop vacuum vs. dedicated dust collector
A shop vac ($60-150) handles cleanup and connects to individual tools via small-diameter hoses. It’s a reasonable starting point but has limitations: small-diameter hoses clog with shavings from planers and jointers, capacity is limited (you’ll empty it constantly), and filtration quality varies.
A dedicated single-stage dust collector ($200-500) moves higher volumes of air and handles the output of table saws, planers, and miter saws. A 1 HP collector handles one tool at a time; 1.5-2 HP handles the demands of a small shop with short duct runs.
Duct layout
In a small shop, a mobile dust collector on wheels with a 4-inch flex hose that you move between tools is the practical starting point. As the shop grows, fixed 4-inch PVC or metal ductwork with blast gates at each tool lets you run a central collector. Keep runs short and minimize turns — every 90-degree elbow reduces airflow.
Air filtration
A ceiling-mounted ambient air filtration unit ($100-250) catches the fine dust that collection at the source misses. This is the dust you can’t see — particles under 10 microns that stay suspended for hours and penetrate deep into your lungs. Run the filtration unit during and after work sessions.
Minimum PPE
Even with collection and filtration, wear a dust mask (N95 minimum) or a half-face respirator with P100 filters when sanding, routing, or working with species known to cause sensitization (like cedar, walnut, or exotic hardwoods).
Budget $150-500 for dust management, depending on whether you start with a shop vac and upgrade later or go straight to a dedicated collector.
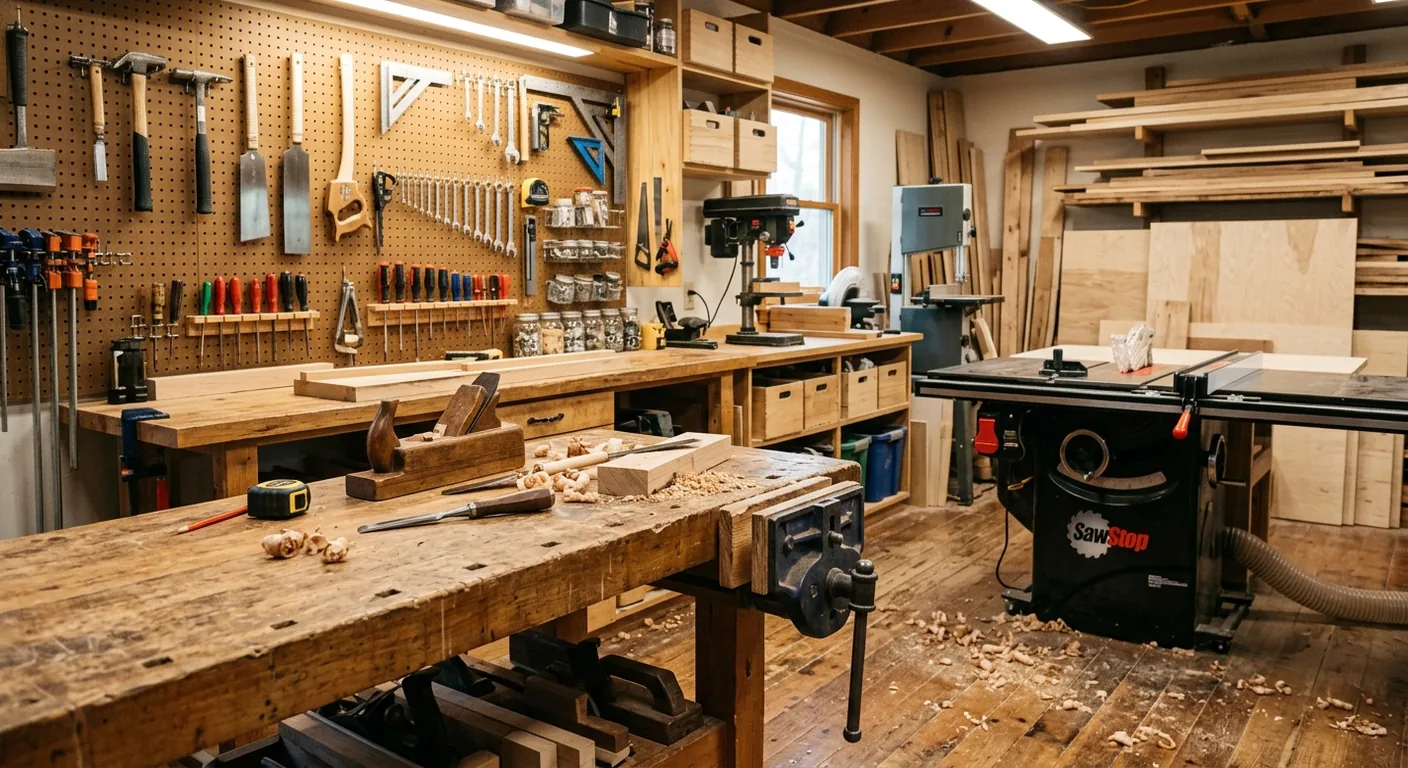
Workshop Layout and Storage
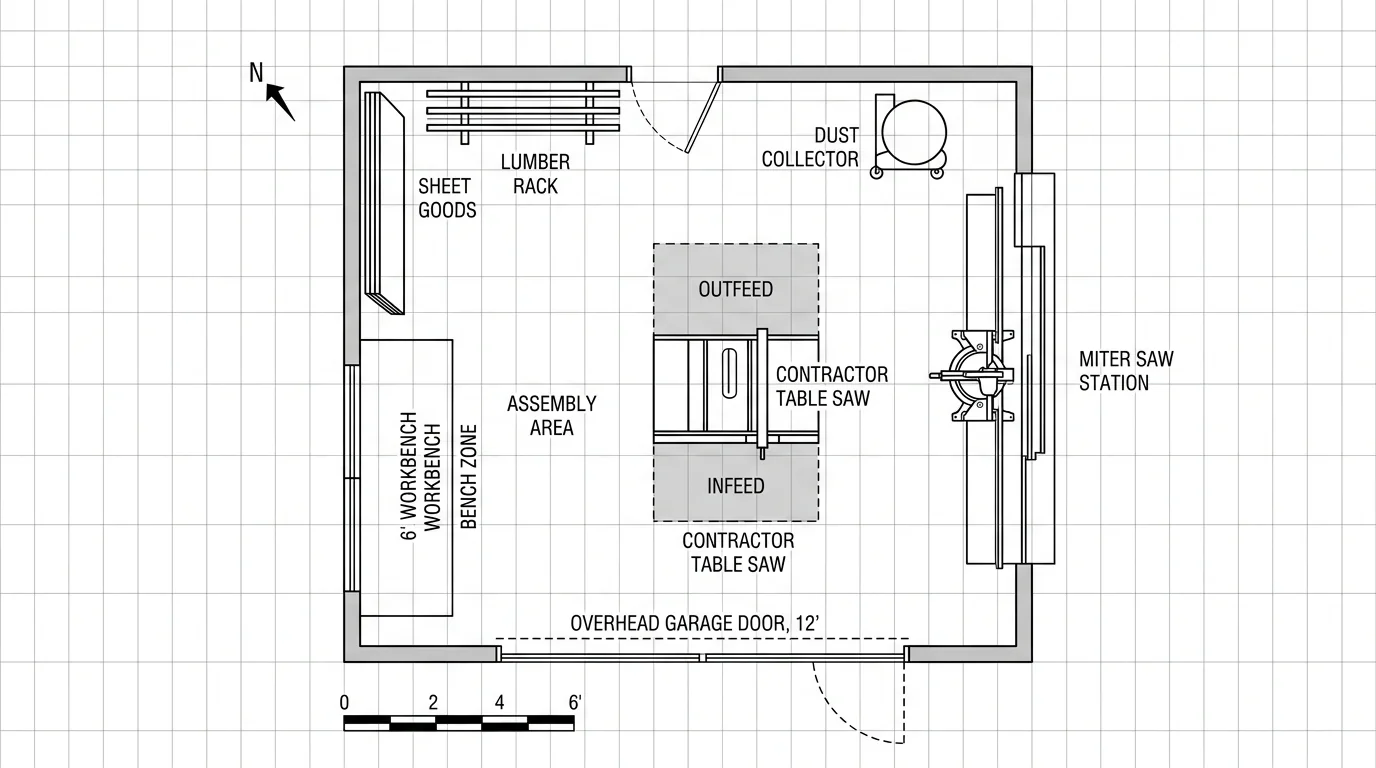
A good layout creates a natural workflow: material comes in, gets dimensioned, gets jointed and shaped, gets assembled, and gets finished. You don’t need a massive space to achieve this — you need a space where tools and work surfaces are positioned so material flows logically.
Core zones
- Machine zone: Table saw at the center (it handles the most operations and needs infeed/outfeed clearance in both directions), with the miter saw and router table within easy reach.
- Bench zone: Workbench against a wall with tool storage above and on both sides. This is where hand work, layout, assembly, and finishing happen.
- Material storage: Lumber racks (wall-mounted horizontal brackets are inexpensive and hold a lot) and sheet goods storage (vertical or leaning against a wall).
- Assembly space: Open floor area near the bench for glue-ups and larger assemblies. In a small shop, this doubles as the space in front of the table saw.
Mobile bases
In a shop under 300 square feet, mobile bases on the table saw, planer, and dust collector let you reconfigure the space for different operations. A good mobile base costs $40-80 and is one of the most space-efficient investments in a small shop.
Wall-mounted storage
Pegboard, French cleats, or a simple slat wall system keeps hand tools visible, accessible, and off the workbench. French cleats (angled strips of plywood that interlock) are particularly versatile — you can make custom holders for any tool and rearrange them freely. Total cost for a wall of French cleat storage: $30-60 in plywood.
Overhead storage
Ceiling-mounted shelves or platforms above the garage door opening (if applicable) store seasonal items and infrequently used materials, keeping floor space clear for work.
Budget Tiers
Here’s what each investment level actually gets you, broken down into a realistic shopping list. These ranges align with the benchmarks from Fine Woodworking’s shop setup guide.
Starter Shop: $1,500-2,500 (buying used)
- Workbench: DIY build from construction lumber — $100-200
- Table saw: Used contractor saw — $150-300
- Drill/driver: New cordless kit — $80-150
- Miter saw: Used 10-inch compound — $75-150
- Hand tools: Chisels, planes, measuring/marking tools, clamps — $150-300
- Shop vacuum: Mid-range with fine-dust filter — $80-120
- Dust masks/respirator: N95 masks and a half-face respirator — $30-50
- Electrical upgrades: Additional outlets, lighting — $100-300
- Storage: Pegboard/French cleats, lumber rack hardware — $50-100
- Safety gear: Glasses, hearing protection — $30-50
This tier gets you working. You can rip, crosscut, route, drill, and do hand work. The tools are used but functional, and the shop infrastructure is in place. You’re limited mainly in the finish quality and speed of production, not in the range of projects you can tackle.
Equipped Shop: $3,000-5,000 (mix of new and used)
Everything in the starter tier, plus:
- Router: New plunge/fixed-base combo kit — $120-250
- Random-orbit sander: New — $50-100
- Table saw upgrade: Better fence, or a more capable used cabinet saw — $200-500
- Dust collector: Dedicated 1-1.5 HP single-stage — $200-400
- Air filtration: Ceiling-mounted unit — $100-250
- Workbench vise: Quality front vise — $50-150
- Additional clamps: Full set of bar clamps in multiple sizes — $80-150
- Electrical: 240V circuit for table saw — $300-600
This is a functional mid-level shop. You can handle joinery, furniture-grade work, finish carpentry prep, and most projects short of production-scale work.
Full Shop: $5,000-10,000
Everything above, plus:
- Planer: Benchtop or floor-standing — $300-700
- Jointer: 6-inch benchtop or 8-inch floor model — $300-800
- Bandsaw: 14-inch — $300-600
- Impact driver: Cordless — $80-150
- Drill press: Benchtop — $150-300
- Upgraded dust collection: 2 HP collector with ductwork — $400-800
- Shop improvements: Insulation, heating, flooring — $500-1,500
At this level, you can dimension rough lumber from scratch (joint, plane, rip to width) and handle the full range of carpentry and woodworking projects independently.
Buying Smart: Used, Refurbished, and Prioritizing
The fastest way to overspend on a workshop is to buy everything new, all at once, before you know what your work actually demands.
What to buy used
Table saws, miter saws, jointers, planers, band saws, hand planes, and bench vises are all excellent used purchases. These are mechanically simple tools — cast iron doesn’t wear out, and alignment can be restored. Estate sales, moving sales, and online marketplaces regularly turn up quality tools at 30-60% of retail price. Older American-made tools (particularly hand planes and table saws from the mid-20th century) are often better built than their current equivalents.
What to buy new
Cordless tools (drill/drivers, impact drivers, sanders) — battery technology evolves fast, and older batteries may no longer hold a charge or be available as replacements. Safety gear (respirators, glasses, hearing protection) should always be new. Router bits and saw blades are consumables that dull with use, so condition matters — buy new.
What to skip entirely (for now)
A biscuit joiner, an oscillating multi-tool, a belt sander, a scroll saw, and a lathe are all useful tools that don’t belong in a first workshop. You’ll know when you need them because a specific project will demand it. Until then, they take up space and budget that’s better directed elsewhere.
Makerspace and community shop alternative
If budget or space is a hard constraint, a makerspace membership ($50-150/month in most cities) gives you access to tools you can’t afford yet — cabinet-grade table saws, wide-belt sanders, CNC routers, laser cutters. Use the membership to learn what tools you actually reach for before committing your own money. Many woodworking programs include shop access as part of the curriculum, which serves a similar purpose.
The incremental approach
Start with the Starter tier. Work in that shop for three to six months. You’ll discover what you actually need versus what you thought you’d need — and those two lists are rarely the same. Then upgrade deliberately, one tool at a time, investing in the areas where your current setup creates bottlenecks.
Start Your Carpentry Career
A workshop is a tool for building things — including a career. Carpentry is a field with strong long-term demand: the Bureau of Labor Statistics projects 4% job growth through 2034, with roughly 74,100 openings per year across an occupation that already employs 959,000 people. The median annual wage is $59,310, with significant upside as you advance into specialized or supervisory roles.
If you’re setting up a workshop now, you may already be thinking about making this a career. Formal training accelerates that path. Browse carpentry programs and woodworking programs at trade schools near you to find programs that combine classroom instruction with hands-on shop time — many of which will have better-equipped workshops than what you can build at home, giving you access to industrial-grade tools while you learn.
For a broader look at what the career path involves — apprenticeships, specializations, advancement, and earning potential at each stage — read our guide on carpentry career opportunities. And if you’re starting from scratch and want to understand all the routes into the trade, our article on how to become a carpenter lays out the options.
The workshop is where the work happens. Set yours up thoughtfully, invest in it gradually, and let the projects — and the skills — build from there.
Sources
- U.S. Bureau of Labor Statistics — Occupational Outlook Handbook — “Carpenters” — https://www.bls.gov/ooh/construction-and-extraction/carpenters.htm
- OSHA — “Wood Dust” — https://www.osha.gov/wood-dust
- OSHA — eTool — “Woodworking: Wood Dust” — https://www.osha.gov/etools/woodworking/production/wood-dust
- OSHA — “Wood Dust: Solutions” — https://www.osha.gov/wood-dust/solutions
- Fine Woodworking — Asa Christiana — “Set Up Shop for $5,000” — https://www.finewoodworking.com/project-guides/beginner-projects/set-up-shop-for-5000
- Popular Woodworking — Dan Farnbach — “11 Basic Woodworking Tools” — https://www.popularwoodworking.com/tools/11-or-so-basic-woodworking-tools/
- Electrical License Renewal — NEC 210.11(C)(4) — Garage Circuit Requirements — https://www.electricallicenserenewal.com/Electrical-Continuing-Education-Courses/NEC-Content.php?sectionID=233